Roofs are designed to protect buildings against rain, snow, sunlight, and extreme temperatures. They can be constructed of various materials, such as asphalt shingles or metal panels.
If you decide to tackle your own roof installation, always wear proper safety equipment and be careful when working on steep or high slopes. A fall from the roof could be deadly or cause lifelong injuries. For professional help, contact Montana Roofing Solutions.
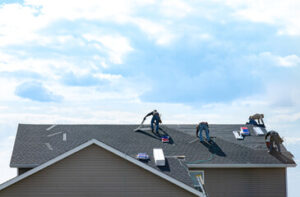
It is absolutely essential that the old roof be removed before the new roof is installed. This is one of the first steps in the roofing process and should be done thoroughly without cutting corners. It’s also a great opportunity for the roofing contractor to check on the sheathing and make any repairs that might be necessary.
Most reputable roofing companies are going to recommend that you get a full tear-off of your existing roof before they install the new one. This is because the quality of a new roof depends entirely on the quality of the decking that it’s fastened to, and if the existing decking is damaged in any way, the new roof will be compromised.
During the roof tear off process, your roofing contractor will start at the top peak of the roof and work their way down the entire surface, section by section. They will take off the ridge caps first, working their shovel or fork underneath the shingles and felt paper to pry them loose and let them slide down the roof jacks to be discarded. They will continue this process, removing shingles and felt paper row by row until they reach the joists or decking of the roof where the gutters will be attached.
You will need to prepare your home for the roof installation by removing any outdoor furnishings, covering landscaping with tarps, and keeping pets inside for safety reasons. It’s also a good idea to have a dumpster delivered and set up nearby, as this will keep the debris off of your yard and driveway and make clean-up much easier. This will be especially helpful if you choose to have your roof made from asphalt shingles, as these can generate quite a bit of waste.
Underlayment
Roof underlayment provides a secondary layer of protection for your home. Typically made from asphalt-saturated felt or synthetic materials, it helps prevent water during a rain event from infiltrating your home. It also acts as a vapor barrier, which prevents moisture from migrating into your home’s structure. There are a few different types of roof underlayment, each of which are best suited for specific roofing materials and weather conditions. It’s important to consult with a roofing professional before choosing an underlayment for your roof, as using the wrong type can cause significant problems.
Felt underlayment is traditionally the most common underlayment material. It is typically made from a combination of organic paper or mat and completely saturated with asphalt. It is available in a range of thicknesses, from No. 15 felt, which is suitable for lightweight projects, to No. 30 felt, which is more durable and fits a wider range of applications. It can be difficult to install, though, especially in areas with steep slopes. It is also susceptible to tearing, so it must be properly installed.
Synthetic underlayment is a modern roofing alternative to felt. It’s typically made from a polymer blend, which is designed to protect against the elements. It is also resistant to fungal growth and is wrinkle-free. It is usually not as cost-effective as felt underlayment, but it has some advantages. It is not as susceptible to tearing, but it does require proper installation to avoid moisture issues. It’s also not as water-resistant as No. 30 felt, so it is not recommended for use in snowy climates.
As with all roof installations, a good roofing contractor will carefully prepare the roof deck before installing the underlayment. They will sweep the sheathing clean, making sure there are no debris or protrusions that could interfere with the underlayment’s ability to lay flat. Then, they will begin installing the underlayment starting at the lowest edge of the roof, such as the eaves or valleys.
Shingles
When the underlayment is in place, it’s time to start laying shingles. Most pros begin at the center of the roof and work both left and right toward the eave and rake edges. Check the shingle manufacturer’s recommendations for specific details. It is usually necessary to apply self-adhesive waterproof underlayment (also called an “ice barrier”) to guard against water seepage that can occur if windblown heavy rain or snow forces water up and under shingles not properly secured to the roof sheathing. This material adheres tightly to bare roof sheathing and seals around nails driven through it. It is available at most roofing supply companies and some home centers.
When laying the first full course of shingles, lay them in a pattern that allows about a tab width of overhang at the sides and leading edge of each row. Nail each shingle down with 4-6 nails per shingle, depending on the weather conditions in your area.
The shingle installation process should include metal flashing to protect the areas around chimneys, vents and other roof penetrations as well as to help the shingles resist damage from wind-driven rain. Ice and water protection membranes can also be applied to the underside of shingle sections that meet walls or other surfaces, such as dormers or skylights.
Calculate how many shingles you’ll need by measuring the length and width of each independent roof section, then multiplying the results by 100 to get the total area of your roof in square feet. You may then divide the number of shingles required by three to get a rough estimate of the number of bundles to purchase. When purchasing the shingles, be sure to pick up a few starter strip shingles (the long rectangular shingles with a self-sealing adhesive strip that gets installed at the eave and rake edge of your roof) as well.
Tiles
Tile roofs come in a variety of shapes, sizes, colors and materials, allowing homeowners to personalize their home. Tile roofing is also durable and resists extreme weather conditions, such as heavy rainfall, preventing leaks.
There are several types of tile roofs, which affects the total cost. Clay tiles are popular in tropical regions and require regular maintenance. They are heavy and can be difficult to lift, so they may need additional reinforcements if they become damaged or cracked.
Concrete tile, on the other hand, is more affordable and requires less maintenance. It has a Class A fire rating and resists mold buildup, insect damage, and water penetration. It is not as aesthetically pleasing as clay tiles, but it can still enhance the look of any structure.
Other popular options include slate tiles, known for their natural beauty, and kawara tiles, which are unique J-shaped roof tiles often ending in a traditional Japanese decoration or symbol. These are the roofs of over 50% of Japan’s temples and shrines, as well as a number of private homes.
Besides the main tiles, a roof will need ridge tiles where two sides meet, apex or verge tiles where three sides come to a point, and hip ends where the ridges end. It will also need caps and cowls to protect vents and other openings on the roof.
A homeowner may also choose a curved roof, which is usually more expensive and requires an expert to install. Curved tiles are also more resistant to mold buildup and rot, making them a good choice for areas with high humidity.
Flashing
When it comes to your roof, flashing is a key piece of the puzzle that helps prevent water leaks. Without it, rain and snow could seep beneath shingles and other roofing materials. This can lead to rot, mildew, and pest infestation. Flashing is a flexible sheet of metal that a roofing professional installs to protect the most vulnerable parts of your roof.
A professional roofer will place flashing around areas where there is a potential for leaks, such as chimneys, joints, and other protrusions. It also protects areas of the roof where it meets walls or other vertical surfaces. Flashing is available in a variety of materials, including galvanized steel, copper, and aluminum. Each type of flashing offers its own unique set of advantages.
Typically, the flashing is installed with a caulking or sealant that provides extra waterproof protection. It is also secured with nails. Depending on the roof, flashing may be exposed or concealed.
In some cases, a roofer will need to use two pieces of flashing. This is often the case with chimneys, which require base and counter flashing. This is done to ensure that rain meets a flashing surface that directs it downwards, rather than leaking into the structure of the house or chimney itself.
Another example of this is the flashing around a plumbing vent. The roofer will place the base flashing down over the pipe, then shingle up to it. They will then place a piece of counter flashing above the base flashing, to ensure that water doesn’t slip underneath the shingles and cause damage.